Cleaning windows, especially those in hard-to-reach areas, can be a daunting task. However, removing your Andersen windows for cleaning might be the most efficient solution. Whether you’re a homeowner in Cathedral City, a property manager in Coachella Valley, or simply someone wanting a clearer view, knowing how to remove and clean Andersen windows properly can make the process much easier and safer. In this blog post, we’ll guide you through the steps to remove Andersen windows, the necessary tools, and cleaning tips that will ensure your windows shine.
What is Andersen Window Removal?
Andersen window removal refers to the process of safely detaching the window sashes or the entire window unit from its frame, making it easier to clean both the inside and outside of the glass. This technique is particularly helpful when you want to clean the exterior glass or reach spots that are hard to clean without removing the window.
The window sashes are the movable parts that include the glass and frame. Andersen windows are designed for easy removal, allowing homeowners and professionals to clean the glass thoroughly. Proper Andersen window care helps maintain their functionality and appearance for years.
Why Choose Private Solar Care for Andersen Window Removal?
At Private Solar Care, we understand the unique challenges homeowners and property managers face when cleaning Andersen windows. In Cathedral City and Coachella Valley, where dust and dirt accumulate quickly, we make it easier to maintain your windows by providing professional window removal and cleaning services.
Here’s why Private Solar Care is the best choice for your window cleaning needs:
- Experience: With over 15 years in the industry, our team specializes in safe window removal techniques for Andersen windows.
- Trustworthy: We use eco-friendly cleaning solutions to ensure your windows are cleaned without harming the environment or your health.
- Local Expertise: We are familiar with the local conditions in Cathedral City and Coachella Valley, where dust, dirt, and harsh weather can quickly damage windows.
- Customer Satisfaction: Our goal is to provide windows that are spotless, streak-free, and well-maintained, enhancing the beauty and value of your property.
How to Remove Andersen Windows for Cleaning: Step-by-Step Guide
Now, let’s walk through the steps for removing Andersen windows for cleaning. Follow this process to safely detach your window sashes and get them ready for a thorough clean.
1. Prepare Your Tools
Before you start, make sure you have the following window cleaning tools:
- A flathead screwdriver or a pry bar
- A ladder (for higher windows)
- A towel or soft cloth
- A bucket of soapy water or your homemade window cleaner
- A microfiber cloth for drying
- A small brush to clean window tracks and frames
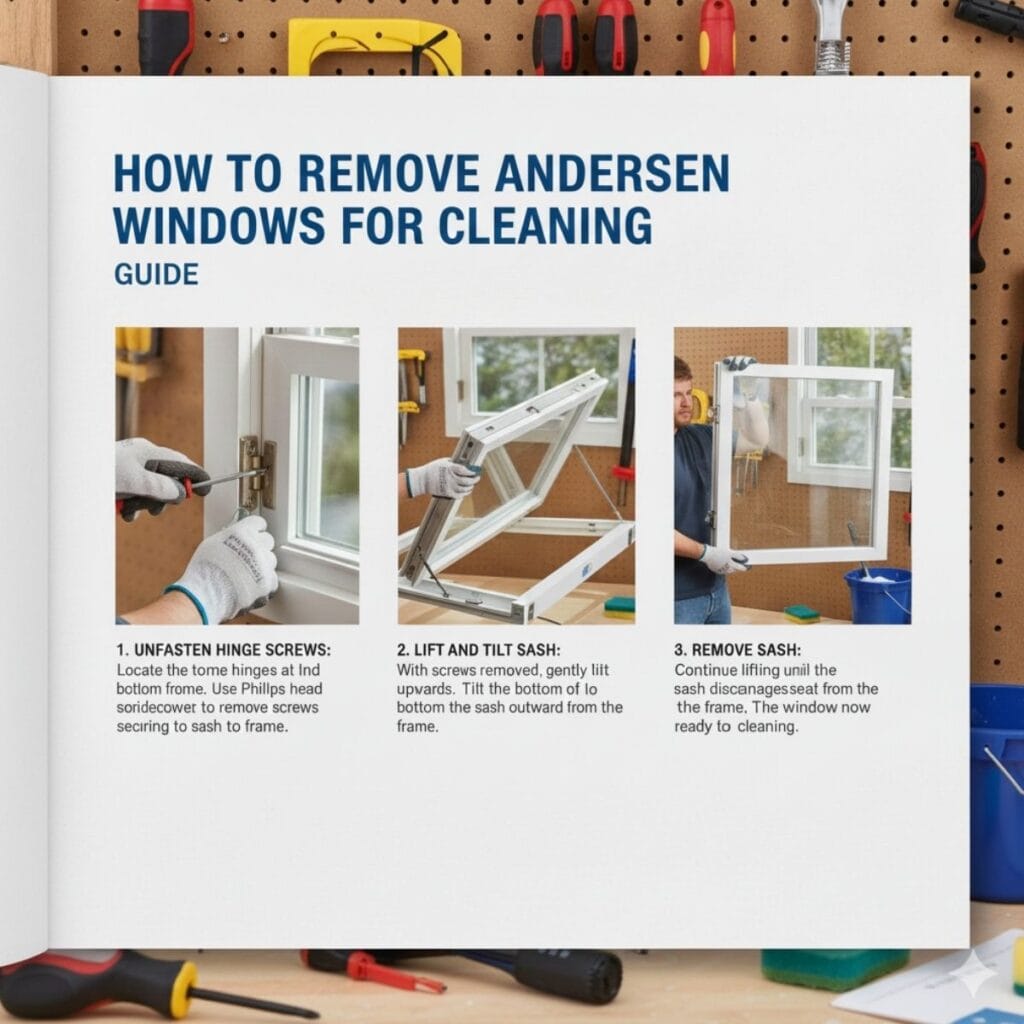
2. Remove the Window Sash
Andersen windows are designed for easy removal. For double-hung Andersen windows, follow these steps:
- Unlock the window: Make sure the window is unlocked and fully opened.
- Release the bottom sash: Lift the bottom sash (for double-hung windows) and tilt it toward you. You’ll notice some tabs or clips on the sides of the sash. Press or slide them to release the sash from the window frame.
- Remove the top sash: Tilt the top sash gently and remove it from the frame. Be sure to handle it carefully to avoid damaging the window or its components.
For casement windows or other types of Andersen windows, refer to the window manual for detailed instructions on sash removal.
3. Clean the Window Glass
Once you’ve removed the sashes, you can now clean both sides of the glass with your DIY window cleaner. Clean the edges and corners where dust tends to build up. Andersen window cleaning and maintenance should focus on removing grime, fingerprints, and smudges to restore clarity.
Use a soft, non-abrasive cloth to scrub the glass. Avoid using harsh chemicals or abrasive materials, as these can damage the glass and window frame.
4. Clean the Tracks and Frame
While the sashes are removed, now is the perfect time to clean the window tracks and frame. Dust, dirt, and debris often accumulate here, affecting the window’s movement and overall function.
- Use a small brush to remove dirt from the tracks.
- Wipe down the frame with a damp cloth to remove any residue.
- If necessary, use a vacuum with a hose attachment to clean the hard-to-reach areas.
5. Reinstall the Window Sash
After cleaning the glass, tracks, and frame, it’s time to reinstall the sashes.
- Align the sash back into the window frame and gently slide it back into position.
- Secure the sash by pressing the clips or tabs back into place.
- Test the window to ensure it moves smoothly and locks properly.
FAQ: Removing Andersen Windows for Cleaning
For homes in Cathedral City and Coachella Valley, where dust and dirt accumulate quickly, it’s recommended to clean your Andersen windows at least twice a year. However, if you live in a particularly dusty or sandy area, you may want to clean your windows more often.
Yes, you can clean your Andersen windows without removing them, but if your windows are heavily soiled or located in hard-to-reach areas, removing the sashes for a more thorough cleaning might be necessary.
No, removing Andersen window sashes is designed to be simple. With the right tools and instructions, you can easily remove the sashes without professional help. However, if you’re unsure, Private Solar Care can assist with window removal and cleaning.
Yes, you can remove casement windows or sliding windows for cleaning, though the method may differ. Always refer to the window’s manual for specific instructions or contact a professional if you’re unsure.
Final Thoughts: Cleaning Your Andersen Windows Made Easy
Cleaning your Andersen windows doesn’t have to be a complicated task. By following these simple steps, you can safely remove the window sashes, clean the glass, tracks, and frames, and reinstall the sashes with ease. If you’re ever unsure or need professional help, Private Solar Care is here to provide expert assistance. We offer professional Andersen window cleaning services that will keep your windows clean, functional, and in top condition for years to come.
For more information or to schedule a professional cleaning, contact Private Solar Care at +1 760-382-6860 or visit our website at privatesolarcare.com. Let us handle your Andersen window maintenance, so you can enjoy a crystal-clear view.
